A Harbinger kill does not automatically upgrade every item you are wearing. The upgrade is tied to a specific item whose current tooltip explicitly says that killing a Harbinger upgrades it. Keep that item in the state required by its tooltip, defeat an actual Harbinger rather than only the Timeline boss, and then inspect the same item again.
The important limitation is that old descriptions of this mechanic do not establish the exact result in version 1.5.2. Do not assume that every qualifying item receives the same kind of affix, that a particular prefix or suffix is guaranteed, or that all historical behavior still applies. The current in-game tooltip on your exact item is the controlling instruction.
Start with the current item tooltip
Before entering a Monolith encounter, inspect the item that mentions a Harbinger kill. Read the entire tooltip rather than relying on the shortened line visible during a quick comparison. You are looking for an instruction attached to that particular item, not a global Harbinger reward rule.
Use the wording to answer four practical questions:
- Which item changes: The trigger belongs to the item carrying the line. It does not apply to unrelated equipment merely because it is equipped at the same time.
- Which enemy is required: A Harbinger is a specific endgame boss connected to a Monolith Timeline. A normal enemy, Nemesis, Timeline boss, or other boss is not interchangeable with it.
- Where the item must be: If the tooltip specifies an equipped state, slot, or other condition, satisfy that condition before the kill. Do not assume an item in the stash or inventory qualifies unless the current wording supports it.
- What result is promised: Treat only the result written on the tooltip as guaranteed. A historical discussion described an added prefix or suffix and a possible fifth affix, but that is not enough to promise the same outcome for every current item.
Take a screenshot or note the item’s complete affix list before the encounter. That gives you a reliable before-and-after comparison and prevents an ordinary loot drop, crafting change, or item swap from being mistaken for the upgrade.
Use the right kill and progression state
Harbingers are encountered after progressing deep into the Monolith of Fate. They are servants of Orobyss, and the Forgotten Knights track your campaign against them. Each Timeline has an associated Harbinger, while the Harbinger series eventually leads toward their leader.
Version 1.5.2 added a Harbinger-available icon to the Nexus interface for each Timeline. Use that interface state as your immediate check before committing to a run. If the relevant Timeline does not show an available Harbinger, killing its ordinary boss may not provide the trigger you are trying to activate.
Follow this minimum path:
- Inspect the target item. Confirm that the current tooltip itself mentions an upgrade connected to killing a Harbinger. Similar-looking rare, exalted, unique, or legendary items should not be assumed to share the mechanic.
- Record the original item. Note its name, implicits, prefixes, suffixes, tiers, and any other visible state. Keep track of the exact copy if you own duplicates.
- Check the Nexus. Select a Timeline where the interface indicates that a Harbinger is available. The icon helps distinguish an eligible opportunity from a Timeline that currently offers only its normal progression.
- Satisfy the item’s stated condition. Equip or place it only as the tooltip requires. If the wording is not explicit about location, avoid making an irreversible change based on an old explanation.
- Defeat the Timeline encounter. Continue through the post-boss sequence and make sure you actually fight and kill the Harbinger. The Timeline boss and the Harbinger are separate enemies even when they occur in the same overall run.
- Reopen the same item immediately. Compare it with your record before crafting, changing equipment, leaving items unidentified, or reorganizing your inventory.
- Judge only visible changes. Check every implicit and explicit affix rather than searching only for the outcome described by an older player. The current item may use different wording or behavior.
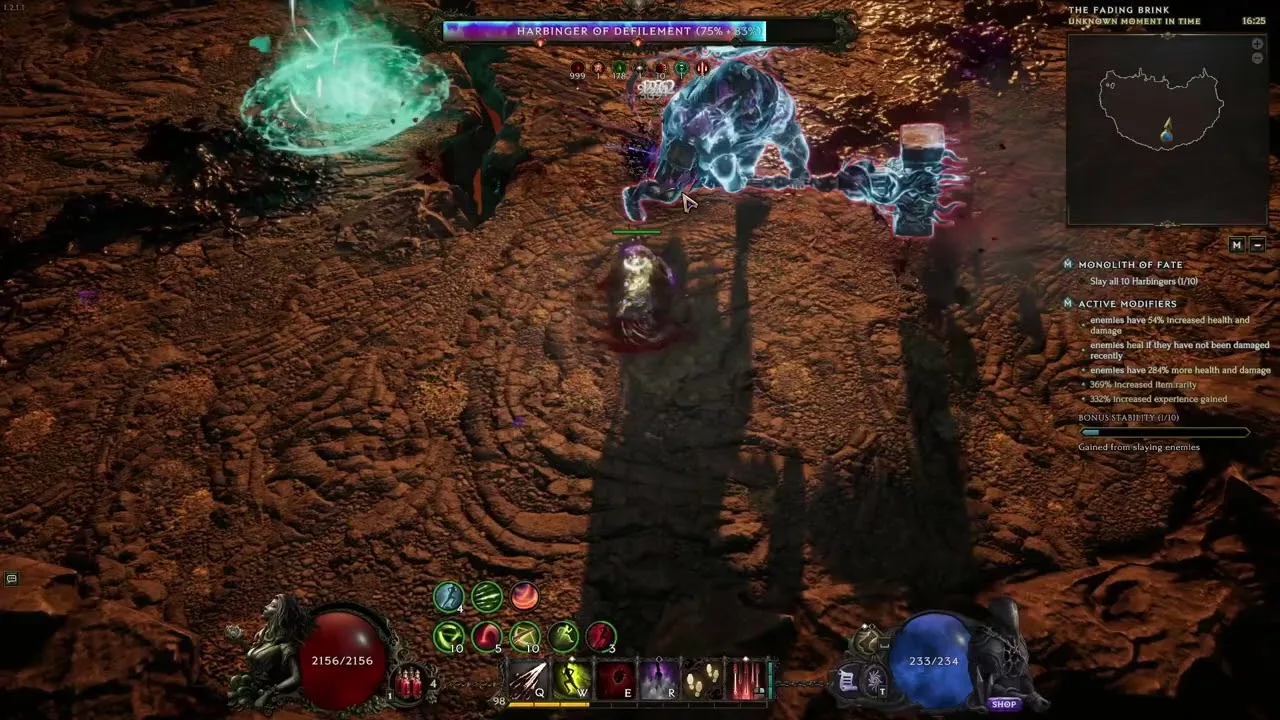
A qualifying Harbinger fight after the Timeline boss encounter.
Harbingers inherit some properties from the boss of their Timeline and also use skills associated with their own agile or tank archetype. That affects the fight, but it does not change the basic verification method: survive the Harbinger encounter, confirm the kill, and compare the exact item afterward.
Separate the three upgrade systems
Several mechanics use the language of upgrading, empowering, or progressing. They are related through Harbinger content, but they do not modify items in the same way.
| Mechanic | Required interaction | What it affects | Key limitation |
|---|---|---|---|
| Item tooltip triggered by a Harbinger kill | Carry out the condition written on the specific item and kill an actual Harbinger | The item carrying that instruction | The exact current tooltip determines the result |
| Nemesis Empower | Choose Empower, defeat the Nemesis, and meet the same Nemesis again | The rewards displayed by that Nemesis | You may Empower twice before you must Challenge or Banish |
| Harbinger’s Needle | Place the Needle in an Idol slot and kill an Empowered Timeline boss | Gaze of Orobyss gain for Corruption progression | It grants three additional Gazes and is destroyed when the Timeline boss dies |
| Forgotten Knights progression | Complete faction quests and defeat stronger Harbingers | Faction rank and its benefits | This is account progression within the relevant realm, not proof that arbitrary gear upgrades |
The distinction matters because each system can produce a different post-fight observation. A Needle disappearing is its intended consumption behavior, not an item-affix upgrade. Forgotten Knights rank progress is a faction result. A Nemesis changing its displayed rewards is Nemesis Empowering. None of those observations proves that the special Harbinger line on another item activated.
Keep Nemesis Empowering separate
Nemeses are formed from the equipment of warriors slain by Harbingers, but their upgrade flow is its own encounter system. When you interact with a Nemesis, you choose among Banish, Challenge, and Empower.
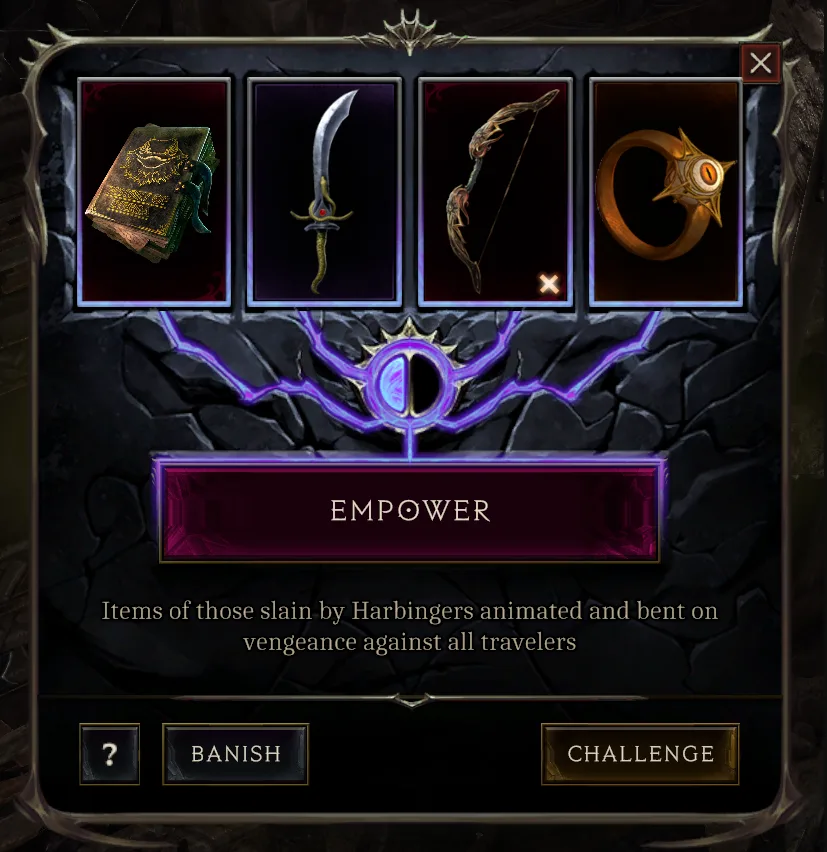
The Nemesis choices are separate from Harbinger-triggered item upgrades.
- Banish removes the current Nemesis without a fight. A later encounter presents a new Nemesis with a new reward set.
- Challenge starts a fight. Defeating the Nemesis grants the items it displayed, and the next encounter uses a new reward set.
- Empower starts a fight that ends with the Nemesis escaping through a rift. When that Nemesis returns, both it and its displayed items have been Empowered.
Empowering can improve rewards in several ways, including adding affixes, increasing existing affix tiers, or adding Forging Potential. Some endgame Nemeses can also let you exchange their unique reward for one of your unique items that has neither Legendary Potential nor Weaver’s Will, giving that item an opportunity to become Legendary or gain Legendary Potential.
You can choose Empower twice. After that, you must Challenge or Banish. An older guide described three Empower actions, but the official current mechanic specifies two; do not plan a third Empower attempt.
This is the most common source of confusion around the Harbinger upgrade query. Nemesis rewards originate from the Harbingers’ lingering influence, but the upgrade is activated through the Nemesis menu and its Empower option. The separate item-tooltip mechanic is activated by the Harbinger kill condition written on that item.
Check the item after the kill
Open the item as soon as the Harbinger is dead and compare each field methodically. Start with the item name and base type so that you know you selected the same copy. Then compare the implicit section, every prefix and suffix, affix tiers, and any special descriptive line.
Use a simple comparison record:
| Field | Before the fight | After the Harbinger kill |
|---|---|---|
| Item name and base | Copy exactly from the tooltip | Confirm it is the same item |
| Implicit values | Record every visible value | Look for a changed value or range |
| Prefixes | Record names and tiers | Check additions and tier changes |
| Suffixes | Record names and tiers | Check additions and tier changes |
| Special text | Copy the Harbinger condition | Check whether it changed or disappeared |
| Forging Potential or other state | Record only what is displayed | Compare without assuming why it changed |
A 2024 player report said the mechanic could add an extra prefix or suffix, allowing five explicit affixes. That report establishes that a Harbinger-triggered item upgrade was a real mechanic; it does not make a fifth affix the universal result in version 1.5.2. If your current tooltip promises different behavior, follow the current tooltip. If it does not specify the outcome clearly, preserve the before-and-after evidence instead of spending a valuable item based on a guessed affix.
Use a short failure checklist
If the item appears unchanged, work through these checks in order.
Confirm that the enemy was a Harbinger
The normal Timeline boss can lead into a Harbinger encounter, but killing the Timeline boss alone is not necessarily the trigger. Confirm that the additional Harbinger appeared and that you completed that fight. The Nexus Harbinger-available icon is the clearest preparatory signal supplied by the current interface.
Confirm that the right item was eligible
Reopen the exact item and read the complete condition. Do not transfer the rule to another item with the same base, appearance, rarity, or affix combination. The mechanic is attached to the tooltip-bearing copy.
Confirm the item’s required state
Check whether you changed equipment sets, moved the item to the stash, placed a different duplicate in the slot, or removed it while preparing for the fight. If the tooltip specifies a location or equipped condition, the state at the kill matters more than where the item was when you first read it.
Separate an affix change from an implicit change
Compare every tooltip section. A player asking whether only implicits changed received a community answer describing an added prefix or suffix instead. That historical exchange is a warning not to inspect only one area of the tooltip, but it is not a guarantee that the same change applies now.
Exclude Harbinger’s Needle behavior
A Harbinger’s Needle is placed in an Idol slot to make an Empowered Timeline boss kill grant three additional Gazes of Orobyss. The Needle is consumed by that boss kill. Patch 1.5.2 fixed a visual issue where a consumed Needle could appear to keep filling its slot until the player changed scenes. If your concern is a Needle remaining visible, that is different from a Harbinger-upgrade item failing to change.
Exclude Nemesis reward changes
If you selected Empower during a Nemesis encounter, the changed rewards belong to that returning Nemesis. The upgrade is not waiting for your next Harbinger kill. Conversely, killing a Harbinger does not substitute for choosing Empower in the Nemesis interface.
Avoid repeating the attempt on an assumption
Do not keep farming Harbingers merely because an old post promised a particular fifth affix. First verify that the current item still carries the trigger, that the correct Harbinger was available, and that you killed it with the item in the required state. If those conditions were satisfied but the item did not visibly change, preserve screenshots of the before state, the current tooltip, and the completed encounter for an in-game bug report.
Treat Harbinger progression as a separate reward
Defeating stronger Harbingers also advances the Forgotten Knights faction. Its ranks provide benefits connected to Nemesis rewards and faster Corruption progression. This faction can coexist with either Circle of Fortune or Merchant’s Guild, so joining it does not require replacing your main item faction.
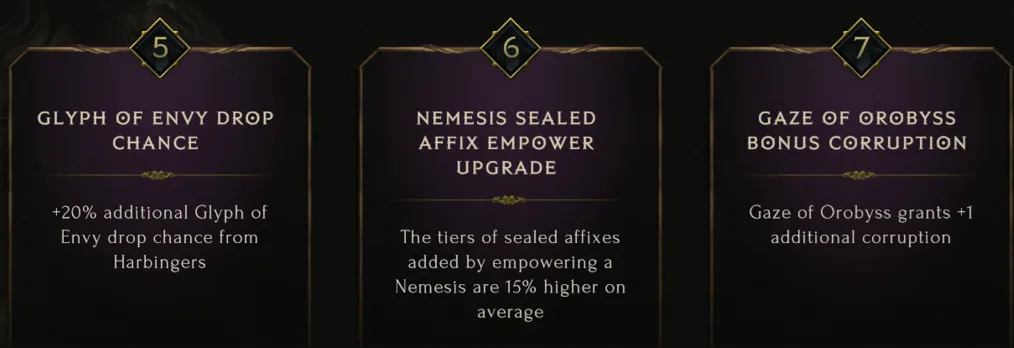
Forgotten Knights progression is a separate reward track.
Progress through the Harbinger series if you want the associated faction benefits and access to their leader. However, do not use a faction-rank increase, Harbinger Eye, Needle drop, unique drop, or Gaze gain as evidence that the tooltip item upgraded. Those are independent rewards from the same family of encounters.
For the item itself, the reliable rule remains narrow: confirm the current Harbinger-kill instruction, satisfy its stated condition, kill the actual Harbinger, and compare the same item immediately afterward. That procedure answers the upgrade question without mixing it with Nemesis Empowering or broader Monolith progression.