This Last Epoch Warpath build is a gear-dependent Void Knight setup for post-campaign Monolith progression in version 1.5.2. Warpath supplies continuous melee damage and fast clearing while Warrior's Fury expands its damage and area during a long channel. Devouring Orb, Anomaly, and Abyssal Echoes support that core with Void Essence generation, buffs, debuffs, and automatic casts.
Open the complete skill and passive planner for the matching Season 5 setup. Switch between Starter, Endgame and Aspirational variants in the planner, and compare their equipment before copying an allocation.
Do not switch into the full setup too early. A practical transition begins around level 80, after you have World Splitter, at least a Tier 5 Reduced Channel Cost affix, and roughly 500 maximum mana. The starter configuration functions below the finished build's ceiling, but it loses much of its comfort and damage if Warpath repeatedly drains the mana bar. Void Well is mandatory once Warrior's Fury becomes part of the setup.
Build at a glance
| Build element | Recommended choice | Why it matters |
|---|---|---|
| Base class | Sentinel | Provides access to Warpath and the defensive foundation for the build |
| Mastery | Void Knight | Adds echoes, void scaling, Void Essence interactions, and the Void Well sustain engine |
| Main skill | Warpath | Clears while moving and ramps damage and area during a sustained channel |
| Damage approach | Void melee critical hits | Matches the Void Knight support package and World Splitter |
| Core support skills | Devouring Orb, Anomaly, Abyssal Echoes | Generate resources, maintain buffs, debuff bosses, and add automated effects |
| Optional fifth skill | Smite | Adds attack speed and some flat fire damage when automatically triggered, but is not required |
| Required sustain tool | Void Well | Restores a percentage of maximum mana when Void Essences are available |
| Initial gear target | World Splitter, Tier 5 or better Reduced Channel Cost, 500 or more mana | Establishes a workable post-campaign version of the build |
| Finished sustain target | Tier 8 Reduced Channel Cost and enough mana for the chosen Warrior's Fury investment | Allows longer channels without collapsing the mana bar |
The build's strengths are its large area, fast clearing, and simple movement-based combat loop. Its main cost is gear dependence. Mana is simultaneously a resource, a sustain breakpoint, and a source of power, so a damage-looking upgrade can make the character feel worse if it removes maximum mana or channel-cost reduction.
When to transition into Warpath
Use this page as an endgame transition guide, not as a campaign leveling route. Warpath can be used earlier, but the finished Void Knight version expects equipment and passive interactions that a fresh character does not yet possess.
Before committing to the full setup, check these conditions:
- Your character has completed the campaign portion needed to begin Monolith progression.
- You can equip World Splitter and have a usable roll of the weapon.
- Your helmet has at least Tier 5 Reduced Channel Cost.
- Your equipment provides approximately 500 or more maximum mana.
- Void Well is allocated before you add meaningful investment to Warrior's Fury.
- Devouring Orb can generate Void Essences reliably while you keep moving.
If one of those pieces is missing, begin with fewer points in Warrior's Fury. The node increases Warpath's damage and area but also raises its mana consumption as the channel continues. The correct investment is therefore determined by your current gear, not by copying the finished allocation immediately.
Skill package and specialization priorities
The build specializes five skills, but only four form the essential engine. Build each tree around its stated job instead of scattering points among unrelated effects.
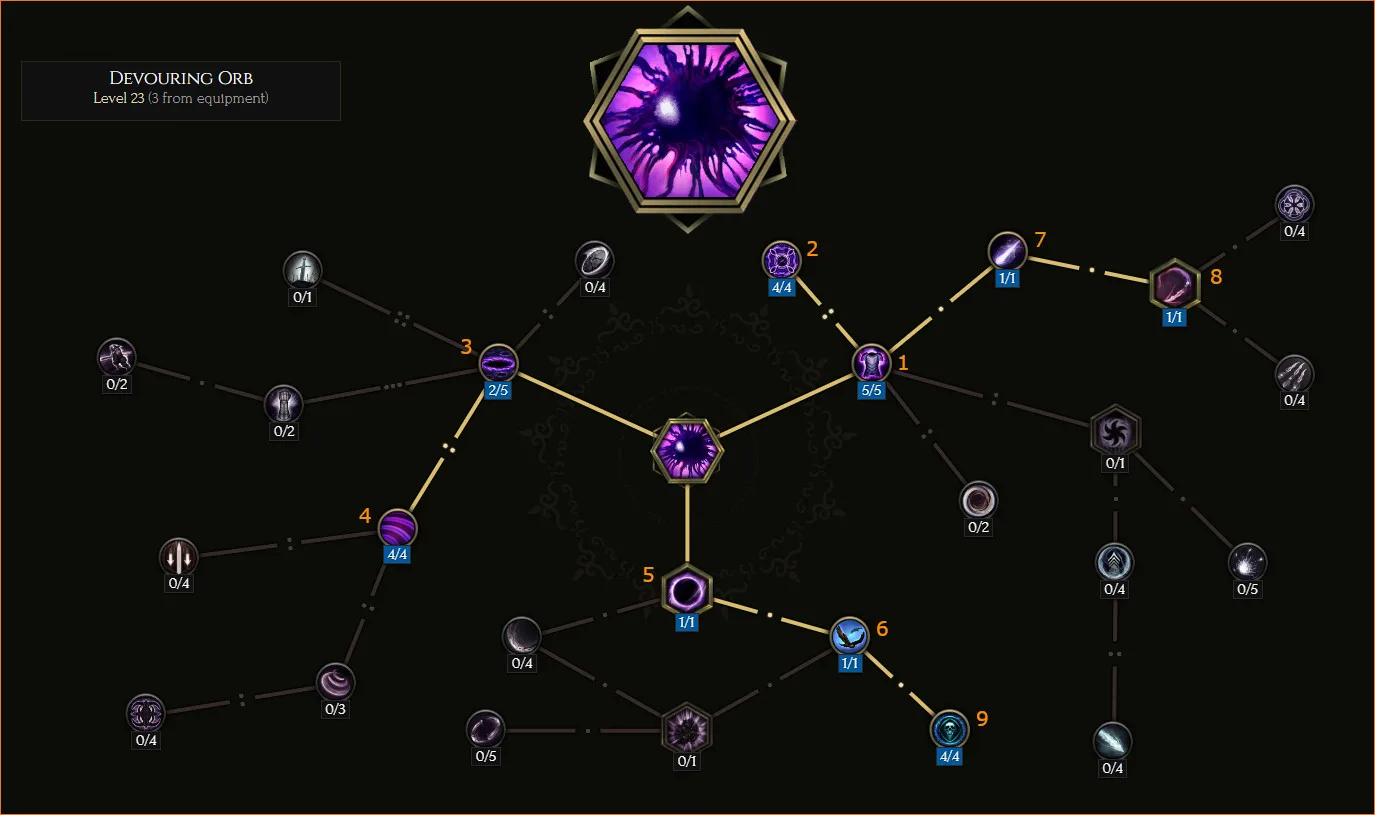
The specialization nodes that support the automated Devouring Orb engine.
Warpath
Warpath is the main attack, movement tool, and trigger platform. Warrior's Fury is its major payoff: staying in the channel progressively increases damage and area, with its scaling duration reaching a maximum of 10 seconds. The same mechanic progressively increases mana pressure.
Echo Knight adds echoes when you have moved at least 4 meters during the previous 2 seconds. This makes deliberate movement part of the damage loop. Circling a boss or passing through a pack is better than spinning in place. Warpath echoes do not inherit the benefit from Warrior's Fury, so the original channel remains the build's central damage source.
Abyssal Tempest lets Warpath trigger Abyssal Echoes. This removes an extra button from normal clearing and keeps the support effect connected to your main action.
Devouring Orb
Devouring Orb supplies additional void effects and, more importantly, helps create the Void Essences needed by Void Well. Abyssal Rush automatically casts Devouring Orb while you are moving, provided the skill is off cooldown and you have enough mana. Abyssal Juggernaut gives an expiring Devouring Orb a chance to grant a Void Essence.
This relationship explains why movement is non-negotiable. If you stop moving, Abyssal Rush stops producing automatic casts. Fewer Orbs then expire, fewer Void Essences become available, and Void Well becomes less reliable. The apparent Warpath mana problem may therefore begin with movement rather than the mana stat itself.
Anomaly
Anomaly is the active bossing button. Borrowed Time makes the cast instant, allowing you to use it without disrupting the flow of combat for long. Build toward Time Bubble and the effects that make it useful to your Void Knight.
Time Bubble slows enemies and shreds their void resistance. It can also supply critical strike chance, attack speed, cooldown recovery, and health leech through its supporting nodes. Time Lord places the Bubble on your character so it moves with you, while Lingering Memory lets its effects persist briefly after something leaves the area.
Mark of Rot increases the void damage taken by enemies affected through Anomaly's return effect. Hit the boss with Anomaly rather than treating it only as a self-buff, then keep fighting inside the moving Time Bubble.
Abyssal Echoes
Abyssal Echoes is primarily a support skill in this configuration. Warpath triggers it through Abyssal Tempest, so it can contribute without becoming another repeated manual cast during ordinary clearing. Its tree can provide area control, armor shred, slow, and other support effects.
Do not base the setup on an interaction whose description specifically requires directly using Abyssal Echoes unless you intend to press the skill manually. Automatic and direct casts do not satisfy every node in the same way.
Smite as the optional fifth skill
Smite is an optional convenience layer rather than a requirement. It can be triggered by Axe Thrower together with a Grand Iron Omen Idol carrying Chance to Cast Smite When You Hit With Throwing Attacks. The supported trigger can cast Smite up to 10 times per 2 seconds.
A specialized Smite adds 20% increased attack speed and a small amount of flat fire damage to the package. If you do not own the required idol, leave Smite out. The build functions with four skills, and a strong Grand Iron Omen Idol with useful prefixes, suffixes, or a corrupted affix can be better than forcing a weak Smite-trigger version. Vitality or Increased Void Damage for 4 Seconds When a Skill Echoes are supported alternatives for that idol slot.
Passive priorities without a copied point map
The exact allocation changes as your character earns passive points and replaces equipment, but three priorities remain stable.
- Allocate Void Well before scaling Warrior's Fury. Void Well restores 30% of maximum mana every 4 seconds while you have the required Void Essences. A larger mana pool therefore improves both the amount restored and the duration for which Warpath can remain active.
- Support Void Essence generation. Devouring Orb's Abyssal Juggernaut is the dependable automated source used by this setup. Essence of the End is another possible source, but it should not replace the Orb engine.
- Maintain recovery. If you do not have Siphon of Anguish, use World Eater for leech rather than leaving the build without a supported recovery route.
Avoid Avatar of Regret in this configuration. Its increased mana cost and reduced attack speed work against the long-channel objective.
Gear priorities and upgrade order
World Splitter is the defining weapon for this version because it combines a large mana contribution with useful damage stats. Craft Melee Critical Strike Chance on it when possible. Its modifiers that scale per mana cost offer little benefit to Warpath: Warpath's mana cost is 1, and its channel cost is not counted for those bonuses.
Build the rest of the equipment in this order:
- Put Reduced Channel Cost on the helmet. Tier 5 or better is the initial target, while Tier 8 is the long-term goal.
- Add maximum mana on the amulet, relic, helmet, gloves, and body armor. Do not remove several mana rolls at once merely because a replacement shows more offensive affixes.
- Improve critical strike support after the channel is stable. World Splitter's crafted melee critical strike chance is part of this step.
- Add movement and attack-speed options without breaking the mana threshold. Carcinization of Momentum supplies Swiftness, which grants 20% movement speed at level 100. Unsated Rage with Berserking Rage can instead supply Frenzy. Falcon Fists supplies attack speed, while Eternal Gauntlets and Swaddling of the Erased are usable alternatives until Immortal Vise is available.
- Improve the remaining damage slots. Army of Skin is a damage-oriented option, while Darkstride trades toward higher movement speed.
To obtain Reduced Channel Cost shards, use Rune of Removal or Rune of Shattering on helmets that drop with the affix. The documented Tier 8 route begins with a Leonine Greathelm carrying a Tier 7 exalted affix and Tier 1 Reduced Channel Cost, raises Reduced Channel Cost with Rune of Havoc, and then upgrades it with Rune of Evolution. Because this is an expensive late upgrade, establish a functional Tier 5 setup before pursuing it.
With Tier 8 Reduced Channel Cost, the five-point Warrior's Fury configuration requires at least 1,200 mana to sustain. Treat that as a finished-build breakpoint, not a requirement for entering Monoliths. If you have less mana, allocate fewer Warrior's Fury points.
Clearing and bossing rotation
Normal Echo clearing is intentionally simple:
- Start Warpath and keep moving through or around enemy packs.
- Maintain the channel long enough for Warrior's Fury to expand its damage and area.
- Continue moving so Abyssal Rush automatically casts Devouring Orb.
- Cover enough distance to satisfy Echo Knight instead of rotating in a tiny stationary circle.
- Let Warpath trigger Abyssal Echoes through Abyssal Tempest.
- Use Anomaly whenever its Time Bubble needs to be refreshed or a dangerous target needs to be debuffed.
Bossing uses the same engine but places more importance on positioning.
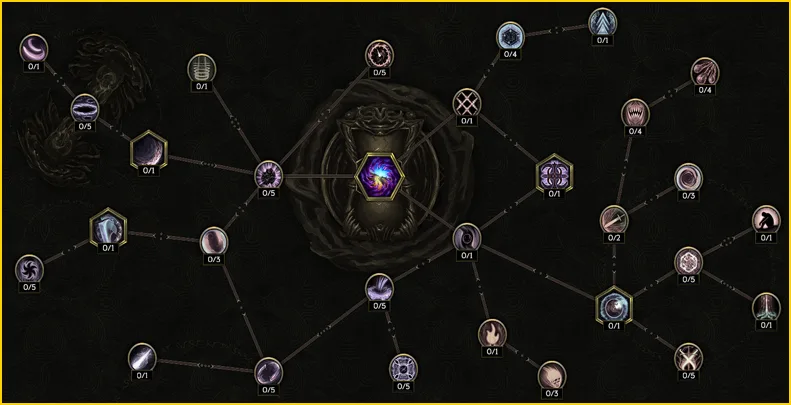
The Anomaly specialization setup used for bossing support.
Cast Anomaly so it hits the boss and activates Mark of Rot. Remain inside the Time Bubble while moving around the target. Travel at least 4 meters during each 2-second window when practical so Echo Knight continues producing echoes. Avoid holding the cursor in one place and spinning without displacement; that preserves Warrior's Fury but abandons two of the build's other engines.
Watch the mana bar during the opening 10 seconds of a boss channel. If mana collapses before Warrior's Fury reaches its full duration, the setup is over-allocated for its current equipment. Correct the breakpoint rather than repeatedly restarting Warpath and losing the ramp.
Fixing common build failures
Warpath stops during a long channel
Your Warrior's Fury investment is too high for the current combination of maximum mana, Reduced Channel Cost, and Void Well recovery. Remove Warrior's Fury points until the channel becomes stable. Then improve the helmet affix and mana rolls before adding those points back.
Void Well does not recover mana reliably
Confirm that Devouring Orb is being cast and allowed to expire. Abyssal Rush requires movement, sufficient mana, and an available cooldown. Standing still can interrupt the complete chain from automatic Orb casts to Void Essences and finally to Void Well.
Damage feels weak after switching
The starter configuration is materially weaker than the completed build. Check World Splitter, the weapon's melee critical strike chance craft, maximum mana rolls, and your ability to maintain Warrior's Fury. A nominally higher damage item is not an upgrade if it shortens every channel.
Boss damage falls behind clearing damage
Make sure Anomaly actually hits the boss so Mark of Rot can apply. Maintain Time Bubble, keep moving far enough for Echo Knight, and avoid restarting Warpath unnecessarily. Large clearing area alone does not replace these single-target conditions.
Smite never triggers
Smite requires the supported Axe Thrower and Grand Iron Omen Idol trigger combination. If the correct idol is missing, remove Smite from the plan and use the four-skill core. Smite is a bonus, not the condition that makes Warpath function.
A gear upgrade makes the build less comfortable
Compare maximum mana and Reduced Channel Cost before evaluating the new item's offensive stats. This build crosses distinct sustain breakpoints. Losing one mana affix can force fewer Warrior's Fury points even when the replacement looks stronger in isolation.
Final readiness checklist
Before pushing deeper into empowered Monoliths, verify the complete system rather than one damage number:
- World Splitter is equipped and supports melee critical strikes.
- The helmet carries the best Reduced Channel Cost tier currently available to you.
- Mana appears on several of the five supported equipment slots.
- Void Well and Devouring Orb's Void Essence engine are active.
- Warrior's Fury is limited to an amount your mana pool can sustain.
- Anomaly maintains Time Bubble and hits bosses for Mark of Rot.
- Your movement is sufficient for both Abyssal Rush and Echo Knight.
- Smite is included only when the correct automatic trigger is present.
- Leech remains covered through Siphon of Anguish or World Eater.
Once those pieces work together, the build delivers its intended loop: keep spinning, keep moving, let the support skills fire around you, and reserve Anomaly for maintaining the bossing window.