Static Orb is a Mage spell built around a travelling orb and a powerful lightning explosion. Its skill tree can turn that basic cast into a high-cost mana burst, a short-range detonation, an orbiting clear tool, a cold and Frostbite spell, or a source of Charged Ground. The important decision is not simply which damage nodes look strongest. You must choose nodes whose travel rules, resource demands, and damage conditions work together.
For the established Sorcerer setup, the central interaction is Manacharged: maximum mana raises Static Orb’s damage while also increasing its cost. Overcharged Detonation then rewards that higher mana cost and makes the orb explode when it hits instead of piercing. This produces a powerful burst pattern, but it also explains the setup’s main limitation: repeated casts can drive you into negative mana, forcing a recovery window with Focus. Current endgame versions therefore depend on substantial mana investment and should not be treated as a low-gear starter package.
This page explains the skill and its route decisions. It does not provide a complete Sorcerer planner or a point-by-point leveling build. Node descriptions are checked against Last Epoch Tools' Static Orb tree; the mana-stacking example follows LizardIRL's Season 5 Sorcerer guide. That guide assumes a level 80 character, has no Starter Planner and labels its setup as gear-dependent. The wiki has not independently played or benchmarked it.
| Question before choosing the Sorcerer route | What the source supports |
|---|---|
| Is this a campaign starter? | The cited guide starts from level 80; unlocking Static Orb earlier does not make the finished package a leveling route |
| What is the equipment commitment? | High mana investment and a unique-heavy endgame configuration; copy one active equipment set from the source rather than combining its mapping and boss variants |
| How does it sustain repeated bursts? | A planned recovery phase with Focus; maximum mana alone does not remove the recovery requirement |
| What has this page verified? | Skill/node wording and the author's stated route requirements, not in-game performance, a full passive allocation or all item rolls |
For a configuration with a linked full planner, compare the Lightning Blast Runemaster guide. Use the Season 5 build selector to compare mastery, stage and equipment commitment before switching characters.
How Static Orb Works
The default spell sends an orb away from you and ends in an explosion. Several branches replace or constrain that behavior, so the first step is deciding where and when you want the explosion to occur. A node that improves distance scaling may lose value if another node forces an early detonation, while a node that removes pulling changes how safely the orb gathers or controls enemies.
Static Orb also has two distinct opportunities to deal damage: the moving orb can hit enemies, and the eventual explosion covers an area. Some nodes modify only one part. Overcharged Detonation, for example, adds more orb hit damage per point of mana cost and prevents piercing, while Storm Burst increases damage and area but makes the spell explode after four meters. Read every modifier according to the component it names rather than assuming all bonuses affect the entire cast.

Travel distance matters in the ordinary version because the spell’s damage and explosion area build as the orb moves. Orbital Fulmination preserves that idea but converts it from distance scaling to time scaling: each orb circles you for up to three seconds, gaining damage and area over time before exploding. Casting beyond your permitted number of orbiting orbs detonates an older one, so rapid casting can trade full charge time for faster explosions.
The base lightning identity is optional. Biting Force converts Static Orb’s base lightning damage to cold, supplies base freeze rate to both the orb and explosion, converts Shock chance into Frostbite chance, and makes Shock-related effects depend on Frostbite instead. It also removes pulling. Once this node is selected, increases to lightning damage no longer scale the converted base damage; cold scaling becomes the relevant choice.
Choosing the Orb’s Travel and Detonation Rules
The following nodes define the spell’s shape more strongly than ordinary damage increases. Build around one coherent delivery method before spending points on secondary bonuses.
| Node | What it changes | Practical use | Important cost or conflict |
|---|---|---|---|
| Overcharged Detonation | The orb explodes on hit, cannot pierce, and gains 1% more orb hit damage per point of mana cost | Concentrated hits against a target reached by the projectile | Losing pierce changes coverage and makes the first collision determine the detonation point |
| Storm Burst | Grants 30% more damage and 30% more area, then forces an explosion after four meters | Predictable short-range clearing and controlled placement | Prevents the long travel normally used to build toward a distant explosion |
| Orbital Fulmination | Orbs circle you for up to three seconds; damage and area scale with time; maximum orbiting orbs increase by one per point | Mobile clearing in which charged orbs follow your movement | Extra casts detonate older orbs, so spamming can shorten their charge time |
| Storm Artillery | Grants 8% more damage, 25% projectile speed, and an arcing path; the orb neither pulls nor hits until it explodes | Delivering the explosion past intervening enemies | Gives up travelling hits and pulling entirely |
| Recurring Orb | A non-exploding orb returns and deals damage on the way back | A return-path pattern when the initial orb survives | Adds eight mana cost and has no effect with Orbital Fulmination |
| Ball Lightning | Reduces mana cost by 26 but gives the orb a 90% chance not to explode | A low-cost, travel-focused alternative | Scatter Blast only has a 20% chance to create small orbs, and Orbital Fulmination loses 35% orbit duration |
| Volatile Outburst | Adds 30% explosion damage ramp per point and reduces projectile speed by 10% per point | Strengthening a cast allowed to travel before exploding | Slower travel delays delivery and is poorly matched with forced short-range detonation |
| Open Circuit | Adds 10% projectile speed and 5% more damage per point | Faster delivery without replacing the core behavior | Faster travel changes timing, so judge it by positioning as well as tooltip damage |
Scatter Blast is a separate coverage choice. Each point sends one smaller orb in a cone. These small orbs can hit the same target as the large orb, but they cannot pull or explode. That makes Scatter Blast useful for adding direct hits rather than multiplying the main explosion. Its interaction with Ball Lightning is especially restrictive because Ball Lightning reduces the chance to produce those small orbs to 20%.
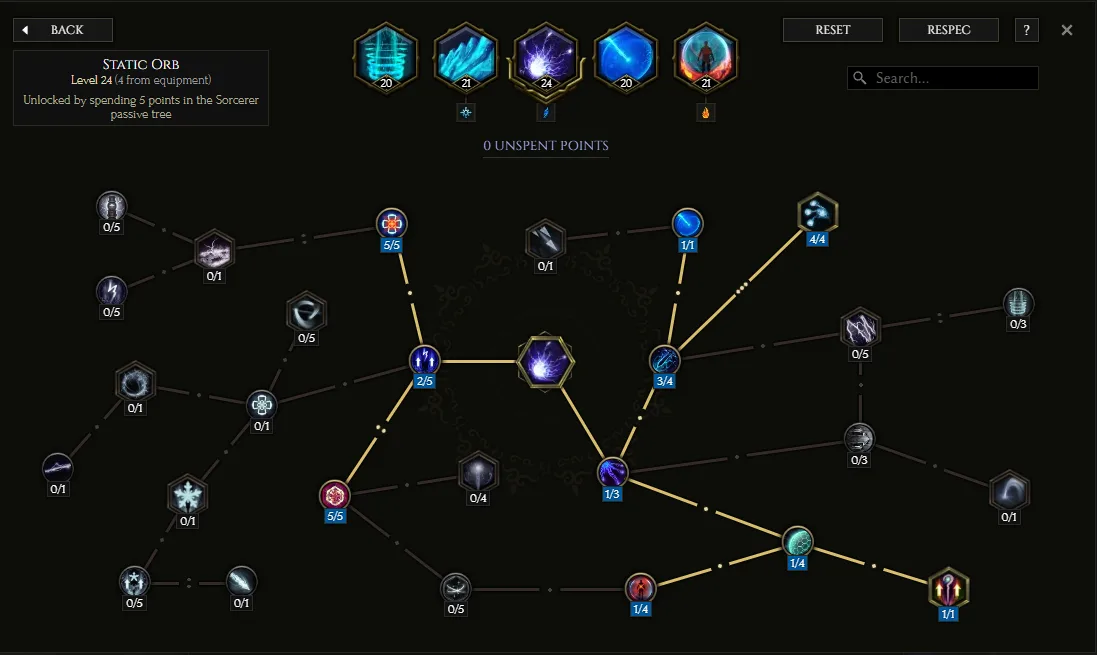
An earlier Static Orb tree illustrates its branching layout; check node names and values in the current client before spending points.
Building a Coherent Damage Package
Static Orb supports several scaling packages, but combining every package is not efficient. Choose the condition you can maintain reliably, then add only the nodes that reinforce it.
Mana-charged burst
Manacharged grants 1% more damage per 25 maximum mana for each point allocated. Each point also adds a mana cost equal to 2% of maximum mana, with the added cost capped at 100. At five points, both sides of the node become significant: maximum mana raises the damage condition, but every cast consumes a larger absolute resource pool.
Overcharged Detonation complements this because its more-damage modifier scales with Static Orb’s mana cost. The result is not free scaling. Raising maximum mana improves the cast while also making recovery management part of the rotation. Natural regeneration is not expected to sustain repeated high-cost casts by itself, which is why Focus and mana-refund effects are practical requirements rather than optional comfort tools.
This package also connects to Sorcerer defenses. Lost Knowledge and Mana Well generate Ward from spell use, while Archmage can refund spell costs. Transient Rest can turn current mana into Ward when you stop moving, but that protection is weaker after you have emptied the resource during a burst. Spend deliberately instead of assuming that more casts always mean more safety.
Shock-based lightning damage
Shocking Conduit supplies 30% Shock chance per point on Static Orb hits. Storm Conductor then grants 12% more spell damage per point against shocked enemies. The sequence matters: apply or maintain Shock first, then receive the conditional damage bonus.
Static Ground makes the explosion leave Charged Ground that deals lightning damage over time. Creating another patch halves the remaining duration of every existing patch, so repeatedly replacing the ground is not the same as maintaining several full-duration areas. Charged Allies adds 20% Shock chance and 20% increased Shock effectiveness per point while you or an ally stands inside that area. This creates a positional package: explode where the fight will continue, stand in the field when safe, and use the extra Shock support for subsequent casts.
Electrocuting Cascade gives Charged Ground 3% more damage per additional 10% critical strike multiplier for each point allocated. This connects ground damage to a critical-multiplier investment, but only makes sense if Charged Ground is an intentional part of the setup.
Critical hits and secondary coverage
Critical Trajectory adds 25% critical strike multiplier per point to Static Orb’s critical strikes. Forking Surge adds two explosion tendrils per point, reaching enemies outside the central explosion. The first node concentrates value into successful critical hits; the second improves the explosion’s surrounding coverage.
Critical scaling also works with Sorcerer passives such as Calculated Destruction. Intelligence supports that passive while also improving Ward retention, so it can contribute to both offense and defense in a mana-stacking Sorcerer. Critical chance still needs to be reliable before heavy critical-multiplier investment delivers consistent results.
Cold, Frostbite, and freeze control
Select Biting Force only when you intend to commit to cold scaling. It converts the base damage and the skill’s Shock relationship rather than merely adding a small cold component. Wintry Power then raises the orb’s freeze-rate multiplier by 10% per point and the explosion’s by 20% per point.
Glacial Orb is the stronger control trade: it adds 60% orb freeze-rate multiplier and 150% explosion freeze-rate multiplier, but removes explosion tendrils. Choose it when freeze reliability matters more than the extra targets reached by tendrils. Because hard enemies may still demand substantial freeze investment, do not assume that selecting one freeze node guarantees control against every target.
Useful Utility and Interaction Nodes
Several nodes support a build without defining its main damage type:
- Static Armor grants Lightning Aegis for two seconds per point whenever you cast Static Orb. Lightning Aegis provides 50% increased lightning damage and 25% less damage taken, then creates a lightning explosion after you lose 25% of your health or after ten seconds. The damage bonus is relevant to a lightning version, while the mitigation remains the immediate defensive reason to maintain it.
- Overwhelming Barrage adds 20% increased stun chance and 20% increased stun duration per point to the explosion, then grants eight Ward per point when that explosion stuns. It is most useful when the target can actually be stunned.
- Arcane Current generates two Static Charges per point whenever Static Orb hits. Treat this as a charge-generation interaction, not as a direct multiplier to the explosion.
- Auxiliary Capacity gives a 25% chance to cast another Static Orb toward the target after hitting a rare enemy or boss, with a five-second cooldown. It provides occasional extra output rather than a predictable cast on every hit.
- Insidious Focus reduces the spell’s mana cost by six but removes pulling. It is a clear resource-versus-control trade when the full Manacharged cost is uncomfortable.
- Atomic Manipulation opens a four-second window after Static Orb. Directly casting Lightning Blast and hitting an enemy during that window returns 25% of Static Orb’s mana cost, with the permitted refund triggers increasing by one per point. If Lightning Blast is on your skill bar, use its direct hits within the four-second refund window.
- Fusionblast makes a limited number of subsequent Lightning Blasts chain two additional times. It improves that follow-up spell’s reach, not Static Orb’s own explosion.
Practical Static Orb Rotation
A mana-stacking Sorcerer plays in bursts rather than as an uninterrupted turret. The following sequence keeps the spell’s resource and defensive requirements visible:
- Position before committing. Use Flame Rush for movement and do not begin a long damage sequence while standing in a dangerous telegraph. If your setup uses Orbital Fulmination, remember that movement carries the orbiting threat with you; if it uses a travelling detonation, create a clear line toward the intended target.
- Establish the relevant condition. Lightning versions want Shock active before relying on Storm Conductor. Charged Ground versions want the explosion placed where the fight continues. Cold versions want their Frostbite and freeze package operating instead of Shock-based bonuses.
- Cast Static Orb through the burst window. With Manacharged, each cast consumes a meaningful share of the resource plan. With Orbital Fulmination, stop before excess casts prematurely detonate the orbs you wanted to charge. With Overcharged Detonation, aim the first collision because the projectile no longer pierces.
- Use Arcane Ascendance for planned extra power. Treat it as a burst activation rather than something that fixes a poor mana cycle. If you chose Flame Ward instead, reserve it for dangerous incoming damage and boss telegraphs.
- Recover with Focus when mana goes negative. The established recovery setup uses Null Infusion and its supporting nodes to improve regeneration while negative. Channel only when positioning permits; Focus is a recovery phase, not immunity from enemy attacks.
- Resume after the resource state is healthy. Avoid immediately emptying the pool again if current mana is also supporting Ward generation through your equipment or passives.
A Julra’s Stardial setup adds another timing layer: a movement or time-travel skill triples the item’s stats for four seconds, with a twelve-second cooldown. Begin the planned burst with the movement skill, use the free-cast interaction available through a specialized Teleport setup if selected, and place the expensive Static Orb casts inside that short item window. This timing is optional and item-dependent, not a universal requirement of the skill.
Common Static Orb Setup Mistakes
The most common failures come from combining nodes whose rules work against one another.
- Investing in travel ramp while forcing an early explosion. Storm Burst detonates after four meters, while Overcharged Detonation explodes on contact. Neither provides the unrestricted travel expected by a distance-ramp plan.
- Expecting Scatter Blast to multiply explosions. Its smaller orbs can hit the same target, but they cannot explode. They add direct-hit coverage rather than copies of the large blast.
- Taking Recurring Orb with Orbital Fulmination. Recurring Orb explicitly has no effect with the orbiting mode, leaving only its added mana cost as a problem if the combination is attempted.
- Using lightning increases after Biting Force. The converted base damage scales with cold increases, not lightning increases. Shock chance also becomes Frostbite chance, so the surrounding package must change with the conversion.
- Treating mana regeneration as full sustain. A Manacharged setup spends too aggressively for ordinary regeneration to erase the recovery phase. Focus, refunds, and controlled casting are part of the design.
- Replacing Charged Ground too quickly. Every new patch halves the remaining duration of existing patches. Cast for useful placement, not merely to refresh visual coverage.
- Assuming Ward makes positioning optional. Mana-derived Ward can build slowly, and Transient Rest depends on current mana. After a full burst, both your casting resource and part of your defensive engine may be weaker.
- Copying a finished endgame setup onto a fresh character. The current mana-stacking version is gear-heavy and is presented for an established character rather than as a starter. Static Orb itself can still be used earlier, but the complete high-mana package should wait until the resource, critical, and defensive pieces are present.
A Simple Decision Path
Choose Manacharged plus Overcharged Detonation when you want expensive, concentrated burst and are prepared to manage negative mana with Focus. Choose Orbital Fulmination when you want timed orbs that travel with you during mapping, while controlling cast frequency so older orbs do not detonate too soon. Choose Biting Force when you want a cold, Frostbite, and freeze identity and are willing to abandon lightning scaling and pulling. Choose Static Ground when persistent area damage and positional Shock support matter more than placing every point into the initial explosion.
Whichever route you select, verify three things before adding secondary nodes: where the orb will detonate, which condition supplies its damage, and how you recover the mana spent. If those three answers agree, the remaining choices—critical multiplier, tendrils, stun Ward, Shock support, or freeze control—become straightforward refinements instead of conflicting mechanics.
Sources and verification limits
Checked on 11 October 2026, with Season 5 / 1.5.2.1 as the version context. A patch version label does not mean that every tree, item interaction or endgame variant has been tested again after the hotfix.
- Static Orb skill page and node descriptions: projectile, explosion, conversion and resource rules. This is Dammitt's community database, not an official developer guide.
- LizardIRL's Static Orb Sorcerer guide: the selected mana-stacking example, level 80 assumption, Focus recovery and equipment commitment. Its endgame, aspirational, boss and mapping sets are separate choices.
- Official patch notes: check balance and bug-fix changes before copying a node or item interaction. The historical in-body tree illustration is not a current allocation map.
The rotation and decision checks here are practical interpretations of those mechanics. No corruption threshold, damage benchmark, boss clear or item-drop outcome is claimed as a result reproduced by this wiki.